
- Open the template of signature, with format file.HTML(double click or drag to Chrome browser) recommended use Chrome for open first time.
- Select All (Ctrl + A) on Windows or Cmd A on Mac, and then Copy
- Login to Gmail/G Suite.
- Click the gear icon in the upper right corner and choose Settings.
- On the General tab (default), scroll down to the Signature section.
- Paste the copied signature in the Edit signature section (Ctrl + V).
- Choose whether to insert the signature at the very bottom of the conversation chain, or under the latest replies (optional).
- Scroll down and click Save changes.
---------------------------------------------------------------------------------------------------------------------------
IMPORTANT: Before you begin, make sure that you don’t have Plain text mode enabled. To learn how to disable it:
1. While logged in to your Gmail / Google Apps account click the gear icon in the upper right corner (Fig.1) and select Settings:
Fig.1. Settings/Gear icon in Gmail/Google Apps.
2. In the General tab (default), scroll down to the Signature section (Fig.2).
 Fig.2. Signature section in the General tab. The Insert this signature before quoted text… option allows you to decide whether the signature should be inserted right below your reply/forward text (option checked) or at the very bottom of the conversation chain (option unchecked).
3. Create or modify the signature. The editor gives you a few basic formatting options such as font face, font size (small, normal, large and huge), hyperlinks, images, alignment etc. To compose more advanced email signatures. Signatures composed within the generator can be easily copied and pasted to the Gmail’s editor.
To add an image to your signature, click the Insert Image button:
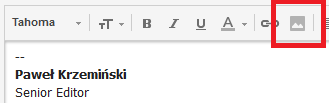
In the resulting dialog, navigate to the image and click Select. (once the image is inserted you can change its position by dragging and dropping)
To add a hyperlink to an image or text, highlight it and click the Link button:
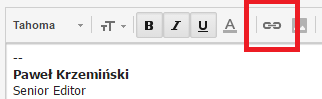
Complete the resulting Edit link dialog and click OK.
4. When you are finished, scroll down to the bottom and click Save Changes (Fig.3).

Fig.3. Save Changes button at the bottom of the General tab.
NOTE: If in the Gmail message composer you selected Plain text mode (Fig.4), the options in the Signature section (Fig.2) will be: No signature and Plain text (you will not be able to use any text formatting). To use a rich text signature editor as in Fig. 2, click your Inbox to switch to Inbox view, click Compose to open the message composer, click the downward More options arrow in the lower right corner, uncheck Plain text mode, wait a couple of seconds for the changes to be saved and go back to Settings, General, Signature (Fig.2).

Fig.4. Plain text mode and the More options arrow in the Gmail message composer.
After successfully completing the procedure, every new email, reply or forward you compose will already contain your signature in the position you selected in Step 2.
Comments
Post a Comment